There are cases where you may wish to track members that are not registered with your account. Check on Me provides this functionality as well, but requires a little more configuration on your side since you have to add the foreign member to your list.
To add a foreign member to your list proceed as following:
- Open Check on Me
- Select “Members“
- Click on “Add New Member“
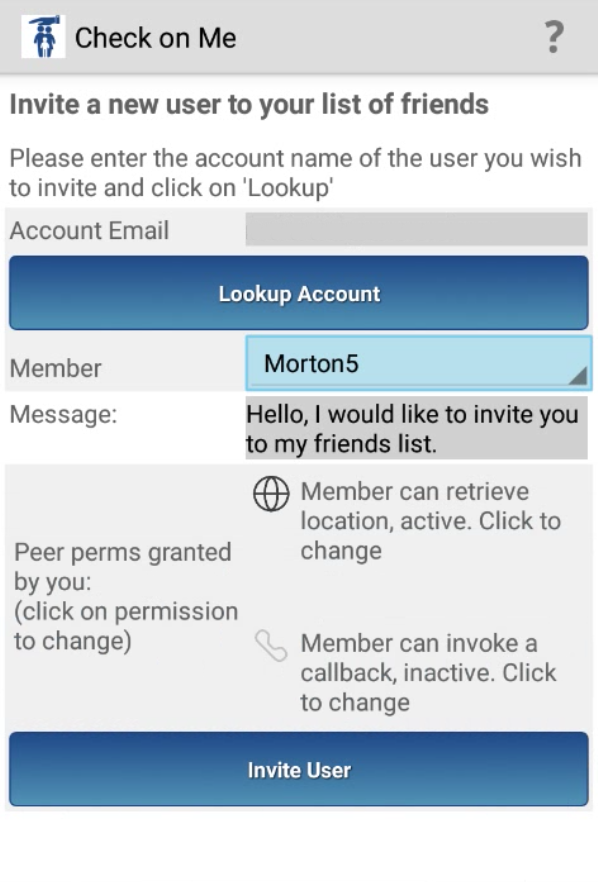
- Now you have to enter the account name to which the member belongs. If you don’t know the account name you need to check with the member.
- Once entered click on “Lookup Account“
- Check on Me will then check with its server whether the account exists and which users have chosen to be listed in the account directory. These members will be listed for selection.
- Select the member that you wish to track, enter a message so that the member understands why you send this invitation, select the permissions you would like to grant to the member. Once done, click on “Invite User“.
- The request is the sent to the other user, and he/she has to approve the invitation.
- Once the user has approved your request you are connected to the user. Depending on the permissions granted to the user the foreign member can track you, or – if the foreign member granted you permissions – you can track the foreign member.
Note that you can change the permissions you granted to the member at any time. But you can never change the permissions that the member grants to you – this can only be done by the other member. See here for details.
Also note that the connection is only between you and the foreign user. Other members of your family are not connected to the foreign user and cannot track that user or be tracked by that users. To enable this, the particular family member(s) need execute the same steps as above to connect to the foreign user.
Similarly to you inviting foreign members, another user can invite you to join his network. In this case you will receive an invitation request, which will be shown in the Event List.
- Click on the request to open it and view the details. Part of these details is the invitation message that should provide you with more insight why that user invites you.
- If you wish to accept the request click on the “Accept” button. You can then grant some permissions to the foreign member. You are now connected to the new foreign member.
- If you wish to reject the request then click on the “Reject” button. You will not be connected to the foreign user and the foreign user will not be connected to you.
For step-by-step instructions please refer to the following section of our YouTube tutorial.